Blueprint is a pre-configured template on the Blynk IoT platform, that will help you create a fully functional project in a few minutes. It already includes mobile and web dashboard UI, working firmware, and a tutorial to help you connect your device to the Blynk IoT platform and control it from the app!
On this page you can review the blueprint to have an idea of the ready project you are going to get. Sign up for a free account on the Blynk IoT platform to try it out.
Milesight EM300 - Water Leak Detector Blueprint Guide
The Milesight EM300 Water Leak Detector monitors and detects water leaks in various environments, providing real-time alerts to prevent damage. It also monitors battery levels and RSSI for reliable operation. This guide provides step-by-step instructions to set up the sensor, register it with The Things Network (TTN), and integrate it with Blynk IoT for data visualization and control.
Step 1: Unpacking and Initial Setup
1.1 Required Components
Milesight EM300 Water Leak Detector
LoRaWAN Gateway for connectivity
1.2 Initial Setup
Verify Package Contents: Make sure all components are included and undamaged.
Install the Batteries: Insert the batteries into the sensor, ensuring the correct polarity.
Power On the Sensor: Hold the power button for 3 seconds. The LED will confirm activation.
Step 2: Registering the Sensor on The Things Network (TTN)
2.1 Setting Up the LoRaWAN Gateway if you don't do this before
Follow the manufacturer's instructions to connect the gateway to TTN.
Ensure the gateway is online and visible in the TTN Console.
2.2 Creating a New Application
Log in to TTN Console.
Create an Application:
Navigate to Applications > Add Application.
Enter:
Application ID
Description
Handler
Click Create Application.
Note: To ensure smooth operation, it’s recommended that all devices within a TTN application are of the same sensor type (e.g., EM300). If you’d like to use different types of sensors, consider creating a separate application for each sensor type. This helps maintain better compatibility and performance.
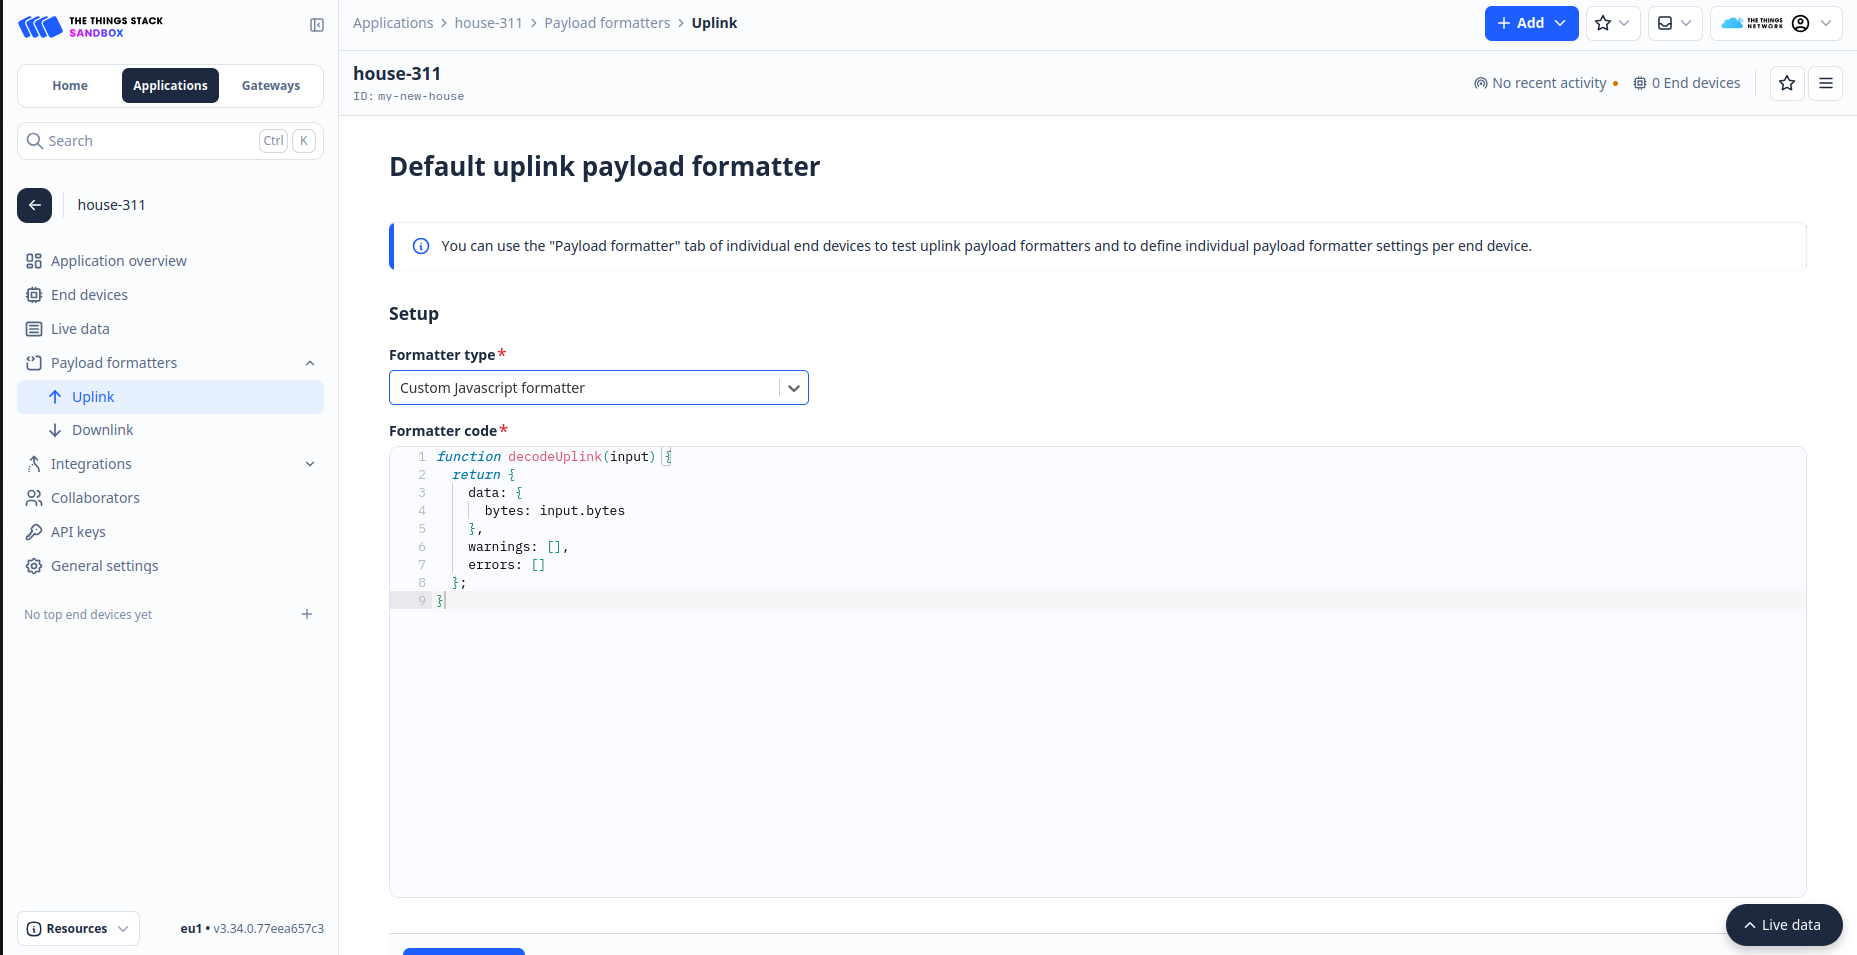
2.3 Setting Up the Payload Formatter in the TTN Application
Open the created application and, from the left-hand menu, select Payload Formatters.
Select the Uplink tab and choose Custom JavaScript Formatter.
Paste the formatter code (see in the Blynk.Console) and click Save Changes.
DevEUI: Use the default value (found on the sensor label).
AppEUI: Use the manufacturer’s default value or generate a new one.
AppKey: Use the manufacturer’s default or generate a new one.
Frequency Plan: Match the frequency plan configured in TTN.
RX2 Data Rate: Set to DR3 (SF9, 125 kHz).
Spreading Factor: Set to SF10-DR2.
Default Application Port: Set to 85.
Use the Write button to save these settings via NFC.
2.5 Configuring MQTT Integration in TTN
Clink to the Use The Blueprint
Navigate to TTN Integration Settings:
In the TTN Console, open your application and select Integrations.
Select MQTT:
Click MQTT from the available integration options.
You’ll need these details to set up the MQTT integration in Blynk:
Server Address
Port
Username
Password: Click Generate new API key and copy the generated key. Keep it secure.
Step 3: Integrating TTN with Blynk
3.1 Configuring Blynk Integration via MQTT
Click "Use Blueprint" at the top of the EM300 blueprint page.
Set Up MQTT in Blynk:
Navigate to Developer Zone -> Integrations -> The Things Stack -> Add, and choose the template named Milesight EM300 ZLD.
Enter the data from Step 2:
Hostname: MQTT server address with port 1883 or 8883
Username
Password: The copied API key
Click Connect.
Step 4: Adding the Sensor as an End Device in TTN console
Open the TTN console, select your application (created in step 2.2) and click Register End Device.
From the LoRaWAN Device Repository:
Brand: Milesight
Model: EM300-ZLD
Hardware/Firmware Version: Use the latest version if unsure
Profile/Region: Based on the Frequency Plan table above
Enter:
DevEUI, JoinEUI (AppEUI), and AppKey from Step 2.3
A unique End Device ID
Click Register Device
Step 5: Onboarding the Sensor to Blynk
You can onboard the sensor in two ways:
Automatic Device Creation – Recommended As soon as the sensor sends data to TTN, it will automatically appear on the Blynk Cloud.
Manual Device Creation – If Something Goes Wrong
Navigate to Devices → Create Device, and select the Milesight-EM300 template.
In the Info & Metadata tab, enter the TheThingsNetwork Device field using the device name from TTN.
Step 6: Monitoring and Analyzing Data
Dashboard Overview
The dashboard is preconfigured, providing an intuitive interface for real-time monitoring. Both web and mobile dashboards offer the same functionality.
At the top of the dashboard, users can view the device name, online status, and last known location, with options to add location tags for better organization. A green Online indicator confirms active connectivity. If water is detected, a red alert banner appears and remains visible until the condition is resolved. Beneath the alert, the Water Status History bar provides a timeline, with green indicating dry periods and red marking water detection events.
The dashboard also displays the device’s battery level, with replacement or recharge recommended below 20% to ensure continuous operation. Current humidity and temperature readings are shown to monitor environmental conditions, and historical graphs are available for trend analysis. Users can adjust the displayed timeframe from Live up to one year. Device settings, such as reporting intervals and thresholds, can be modified via the Edit button.
Regularly checking the device’s connection, battery status, and water detection alerts is essential for maintaining reliable performance and timely incident response.
Step 7: Alerts & Automations
In the Blynk Console, open Automations.
Create triggers based on Device State or Sensor Value.
Example: water == 1 → Send notification
Example: Temperature < 10 → Update dashboard label
Step 8: Adding Location in Blynk
Navigate to the Location section in Blynk.
Enter the address or drag the map pin to the correct location.
Click Save.
In the device's Info & Metadata, assign the saved location.
Step 9: Error Handling and Troubleshooting
9.1 Common Issues
Sensor Not Responding: Check battery orientation and charge. Try a reset.
No Connectivity: Recheck gateway setup and frequency plan.
Missing Data: Update your Payload Formatter in TTN’s Uplink/Downlink settings.


.png)


