Quickly connect your sensor to the cloud and monitor essential environmental data — from air temperature and humidity to wind, precipitation, solar radiation, UV index, and more.
Blueprint is a pre-configured template on the Blynk IoT platform, that will help you create a fully functional project in a few minutes. It already includes mobile and web dashboard UI, working firmware, and a tutorial to help you connect your device to the Blynk IoT platform and control it from the app!
On this page you can review the blueprint to have an idea of the ready project you are going to get. Sign up for a free account on the Blynk IoT platform to try it out.
The SenseCAP S2120 8-in-1 LoRaWAN Weather Sensor is a powerful device designed to measure and transmit key environmental data, including air temperature, humidity, barometric pressure, wind speed, wind direction, precipitation, solar radiation, and UV index. This guide walks you through the setup, registration on The Things Network (TTN), and integration with Blynk IoT for real-time monitoring and control.
Step 1: Unpacking and Initial Setup
1.1 Required Components
SenseCAP S2120 Weather Sensor
LoRaWAN Gateway (e.g., SenseCAP Gateway)
1.2 Initial Setup
Check Package Contents: Ensure all parts are present and undamaged.
Install Batteries or Power Supply: Follow the manual to correctly power up the sensor.
Activate the Sensor: The LED should blink or display a status indicator showing it is ready to join the network.
Step 2: Registering the Gateway on The Things Network (TTN)
Navigate to Gateways > Add Gateway and complete the following fields:
Gateway EUI (from the device label)
Gateway ID
Frequency Plan matching your region (EU868, US915, etc.)
Click Register Gateway
Follow the manufacturer’s instructions to bring the gateway online.
2.2 Creating a New Application
Log in to the TTN Console.
Create an Application:
Navigate to Applications > Add Application.
Enter:
Application ID
Description
Handler
Click Create Application.
Note: For smooth operation, it is recommended that all devices within a TTN application are of the same sensor type (e.g., SenseCAP-S2120). If you plan to use different types of sensors, consider creating a separate application for each sensor type. This helps maintain better compatibility and performance.
2.3 Setting Up the Payload Formatter in the TTN Application
Open the created application and, from the left-hand menu, select Payload Formatters.
Select the Uplink tab and choose Custom JavaScript Formatter.
Paste the formatter code (see in the Blynk.Console) and click Save Change.
Then, switch to the Downlink tab and choose Custom JavaScript Formatter.
Paste the downlink formatter code (see in the Blynk.Console, and click Save Changes
After installing the battery, the red LED will remain steady. Activate Bluetooth by pressing and holding the button for 3 seconds; the LED will flash at a 1-second interval.
Tap Setup to enable Bluetooth, then tap Scan to search for the sensor.
Enter the pairing password
Select the sensor by its BT ID (found on the bottom label). The sensor’s basic info will appear once connected.
Configure Parameters:
SenseCAP S2120 weather stations support 7 frequency plans in a single SKU (863–928 MHz).
Set the correct frequency band based on your gateway’s region.
Tap Settings and choose The Things Network as the platform.
Select the corresponding frequency plan
Configure OTAA parameters:
DevEUI: Use the default (from the sensor label).
AppEUI: 16 hex characters.
AppKey: 32 hex characters.
Tap Send to apply settings.
Tap Home to disconnect Bluetooth. The sensor will reboot; its LED will flash like a breathing light.
2.5 Configuring MQTT Integration in TTN
Open your application in the TTN Console.
Navigate to Integrations and select MQTT.
Collect the required data for Blynk:
Server Address
Port
Username
Password: Click Generate new API key and save the key securely.
Step 3: Integrating TTN with Blynk
3.1 Configuring Blynk Integration via MQTT
Click Use Blueprint at the top of the blueprint page.
Set up MQTT in Blynk:
Go to Developer Zone → Integrations → The Things Stack → Add
Choose the template: SenseCAP-S2120
Fill in:
Hostname
Username
Password: Use the generated API key.
Click Connect
Step 4: Adding the Sensor as an End Device in TTN console
Open the TTN console, select your application (created in step 2.2) and click Register End Device.
From the LoRaWAN Device Repository:
Brand: SenseCAP
Model: S2120 8-in-1 LoRaWAN® Weather Sensor
Hardware/Firmware Version: Use the latest version if unsure
Profile/Region: Based on SenseCAP Mate or the Frequency Plan table above
Enter:
DevEUI, JoinEUI (AppEUI), and AppKey from Step 2.3
A unique End Device ID
Click Register Device
Step 5: Onboarding the Sensor to Blynk
You can onboard the sensor in two ways:
Automatic Device Creation – Recommended As soon as the sensor sends data to TTN, it will automatically appear on the Blynk Cloud.
Manual Device Creation – If Something Goes Wrong
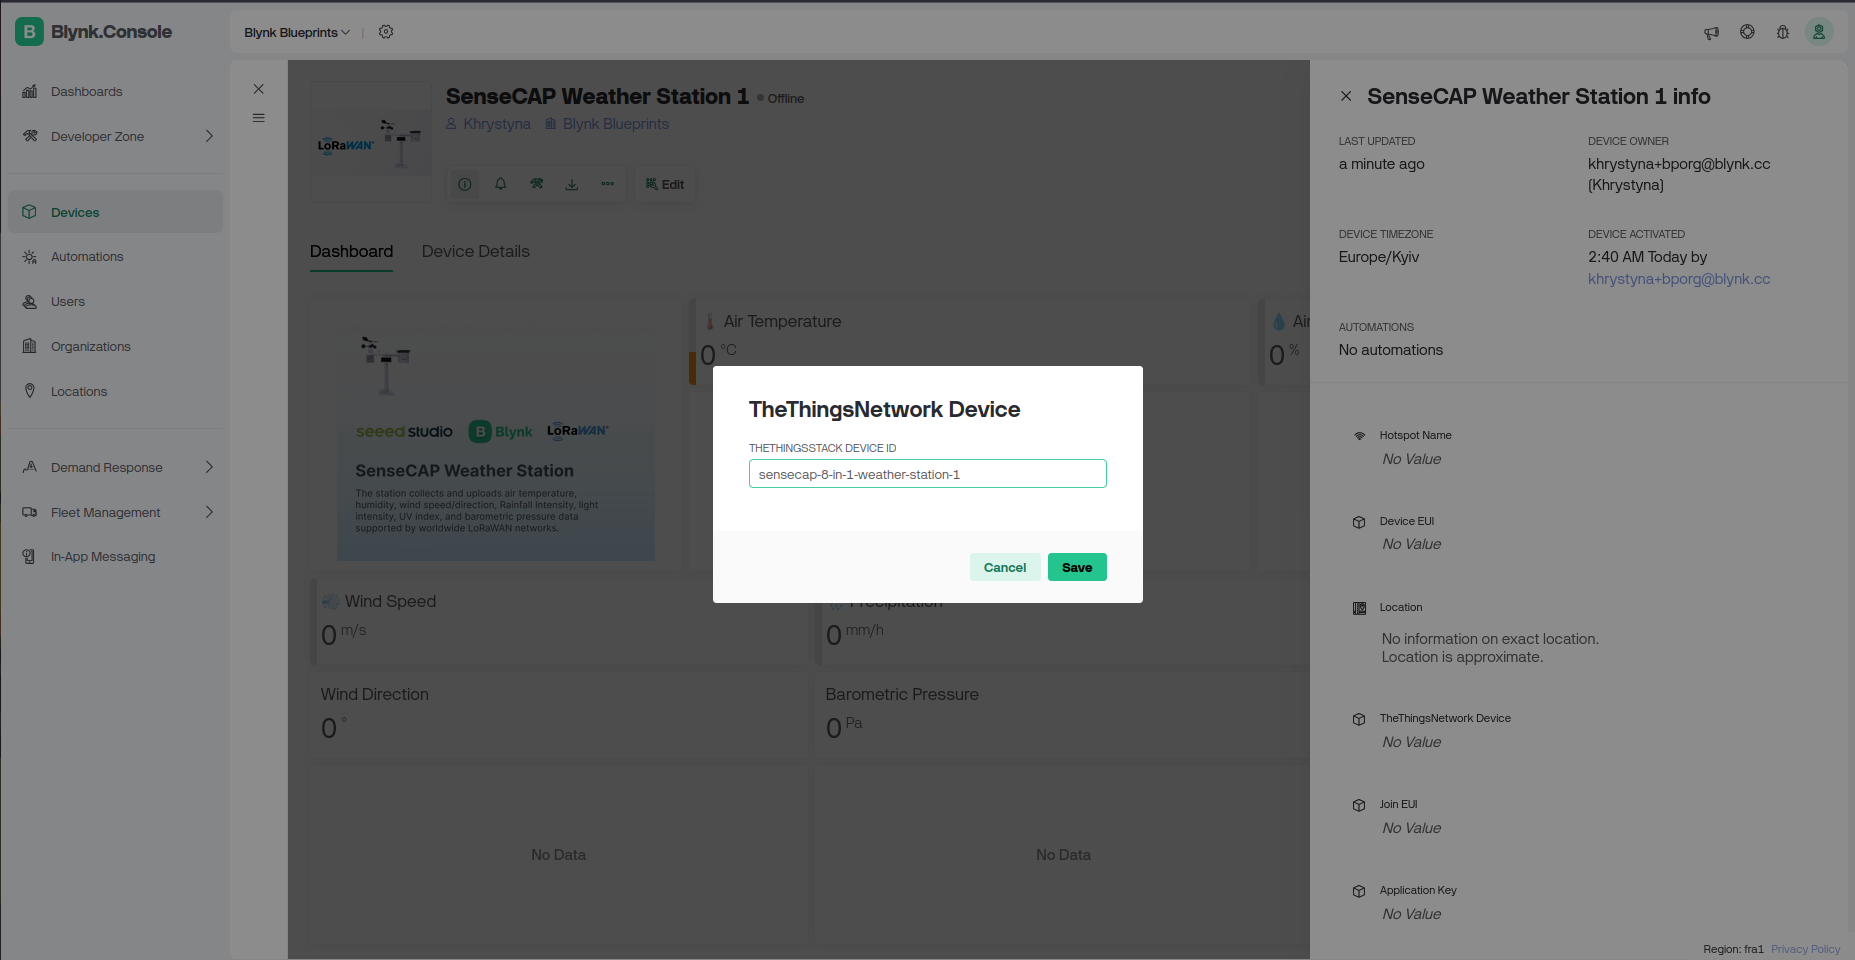
Navigate to Devices → Create Device, and select the SenseCAP-S2120 template.
In the Info & Metadata tab, enter the TheThingsNetwork Device field using the device name from TTN.
Step 6: Monitoring and Analyzing Data
6.1 Dashboard Overview
The preconfigured dashboard supports both web and mobile apps.


.png)


