read the tutorial
Blueprint is a pre-configured template on the Blynk IoT platform, that will help you create a fully functional project in a few minutes. It already includes mobile and web dashboard UI, working firmware, and a tutorial to help you connect your device to the Blynk IoT platform and control it from the app!

On this page you can review the blueprint to have an idea of the ready project you are going to get. Sign up for a free account on the Blynk IoT platform to try it out.

Introduction

This blueprint will guide you through launching your project with the Industrial IoT Long Range Wireless Environmental Temperature, Humidity, Pressure, and Air Quality Sensor.

The sample project consists of the sensor, which measures temperature, humidity, pressure, and air quality, and transmits these measurements wirelessly to the NCD Enterprise IIoT Gateway.

How To Use This Blueprint

1. Unpacking and Initial Setup

Verify that you have all necessary parts. For detailed instructions on unpacking and initial setup, refer to the drawing tab on the product page.

2. Configuring the NCD Enterprise IIoT Gateway

1 Required Components:

  • NCD Enterprise IIoT Gateway
  • Antennas

Attach antennas to the sensor and gateway: This enables wireless communication.

The NCD Enterprise IIoT Gateway facilitates seamless integration and communication between various IoT devices and networks.

If you haven't set up the gateway yet, please visit blynk.cloud and use the blueprint for the gateway for a clearer setup.

If you have already set it up, you can proceed without further action.

2 Access Interfaces

  1. Web Configuration: Access the configuration interface at http://[domain_or_ip] using the credentials ncdio / ncdB3ast.
    • Domain Name: The domain name format is ncd-xxxx.local, where xxxx are the last four characters of the Gateway's MAC address. The MAC address can be found on the side of the device. For example, if the last four characters of your Gateway's MAC address are c398, the domain name would be http://ncd-c398.local.
    • Customization: Set up user accounts, logging, and notifications for specific events.
  2. Node-RED: Access Node-RED at http://[domain_or_ip]:1880.
  3. SSH Access: Connect via SSH with ncdio / ncdB3ast on port 22.

3. Preparing Your Device in Blynk.Cloud

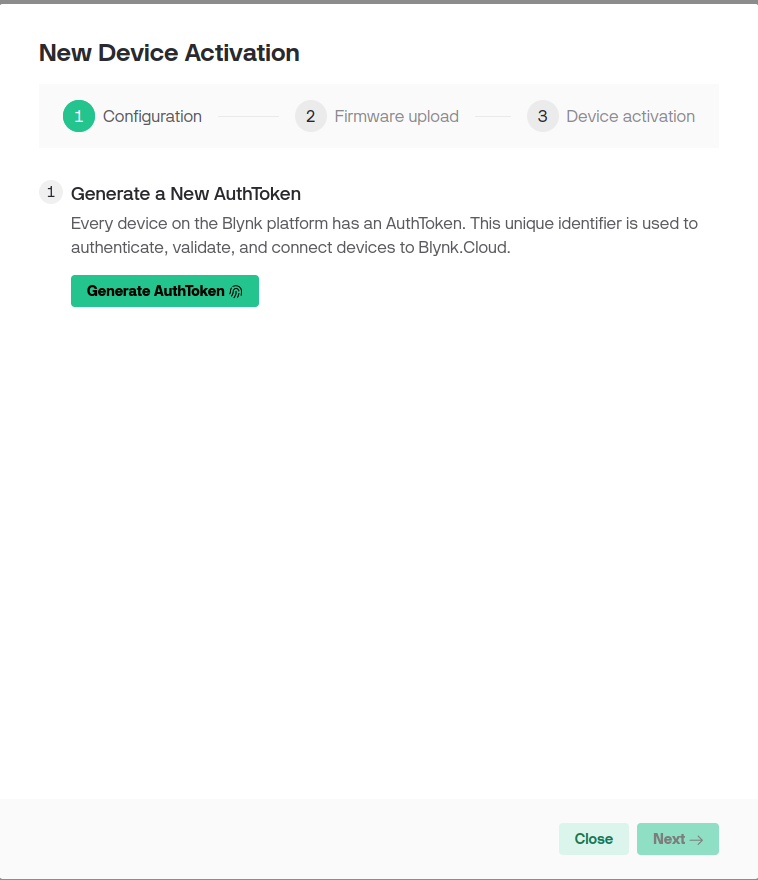
  1. Use the Sensor Blueprint: Click the Use Blueprint button.
  2. Activate the Device: On the right panel, click the Activate Device button.
  3. Generate AuthToken: Click the Generate AuthToken button.
1step

You'll need the generated AuthToken for the next step. Click button Next.

4. Accessing Node-RED on the Gateway

  1. Open a web browser and navigate to http://[domain_or_ip]:1880.
  2. Log in to the Node-RED dashboard.

5. Configuring the Node-RED Flow

  1. Import the Flow:
    • Copy or download the firmware flow file from second step of device activation.
2step
    • In Node-RED, press CTRL + I or use the menu to select Import.
    • Paste the copied code or upload the flow file (.json).
Import

Your flow should look like this:

Node-RED Flow
  1. Set Up MQTT:
    • Click on the any of the highlighted MQTT-out node.
MQTT Out
    • Select the highlighted icon.
MQTT Property
    • Go to the Security tab.
Broker Property
    • Enter the AuthToken generated by Blynk as a password for your device (use “device” as the username) and click "Update".
Security Tab

6. Running the Sample Using Node-RED

Deploy the flow and use Blynk.cloud for testing. Connect during deployment flow, but data will be transferred to the cloud when the gateway receives it from the sensor.

Your dashboard should look like this:

Dashboard

The Environmental Air Quality Dashboard provides a comprehensive, real-time visualization of key environmental parameters to help users monitor and analyze indoor air quality. This intuitive interface presents essential data points and insights, enabling informed decision-making to maintain a healthy environment. The Blynk mobile app provides the same functionality as the web dashboard, allowing you to monitor and manage your system on the go. You can access real-time data, view historical trends directly from your mobile device. This ensures continuous monitoring and timely alerts, helping you maintain optimal system performance anytime, anywhere.

To add a new sensor the same type, you need to repeat this guide for the new device.

Next Steps

Troubleshooting

  1. Connection Problems:
    • Ensure the sensor is powered and within range.
    • Check network settings and firewall rules.
    • Verify the gateway's network connection.
  2. Calibration Errors:
    • Follow the software instructions to recalibrate the sensor.
    • Ensure the environment is stable during calibration.
  3. Node-RED Issues:
    • Flow Not Deploying: Check for syntax errors or missing nodes.
    • MQTT Connection Failure: Verify MQTT broker settings and credentials.

Related Links

More pre-built IoT projects

Need an IoT solution for your business?

Contact us for a free consultation with our engineers and IoT business experts