Introduction
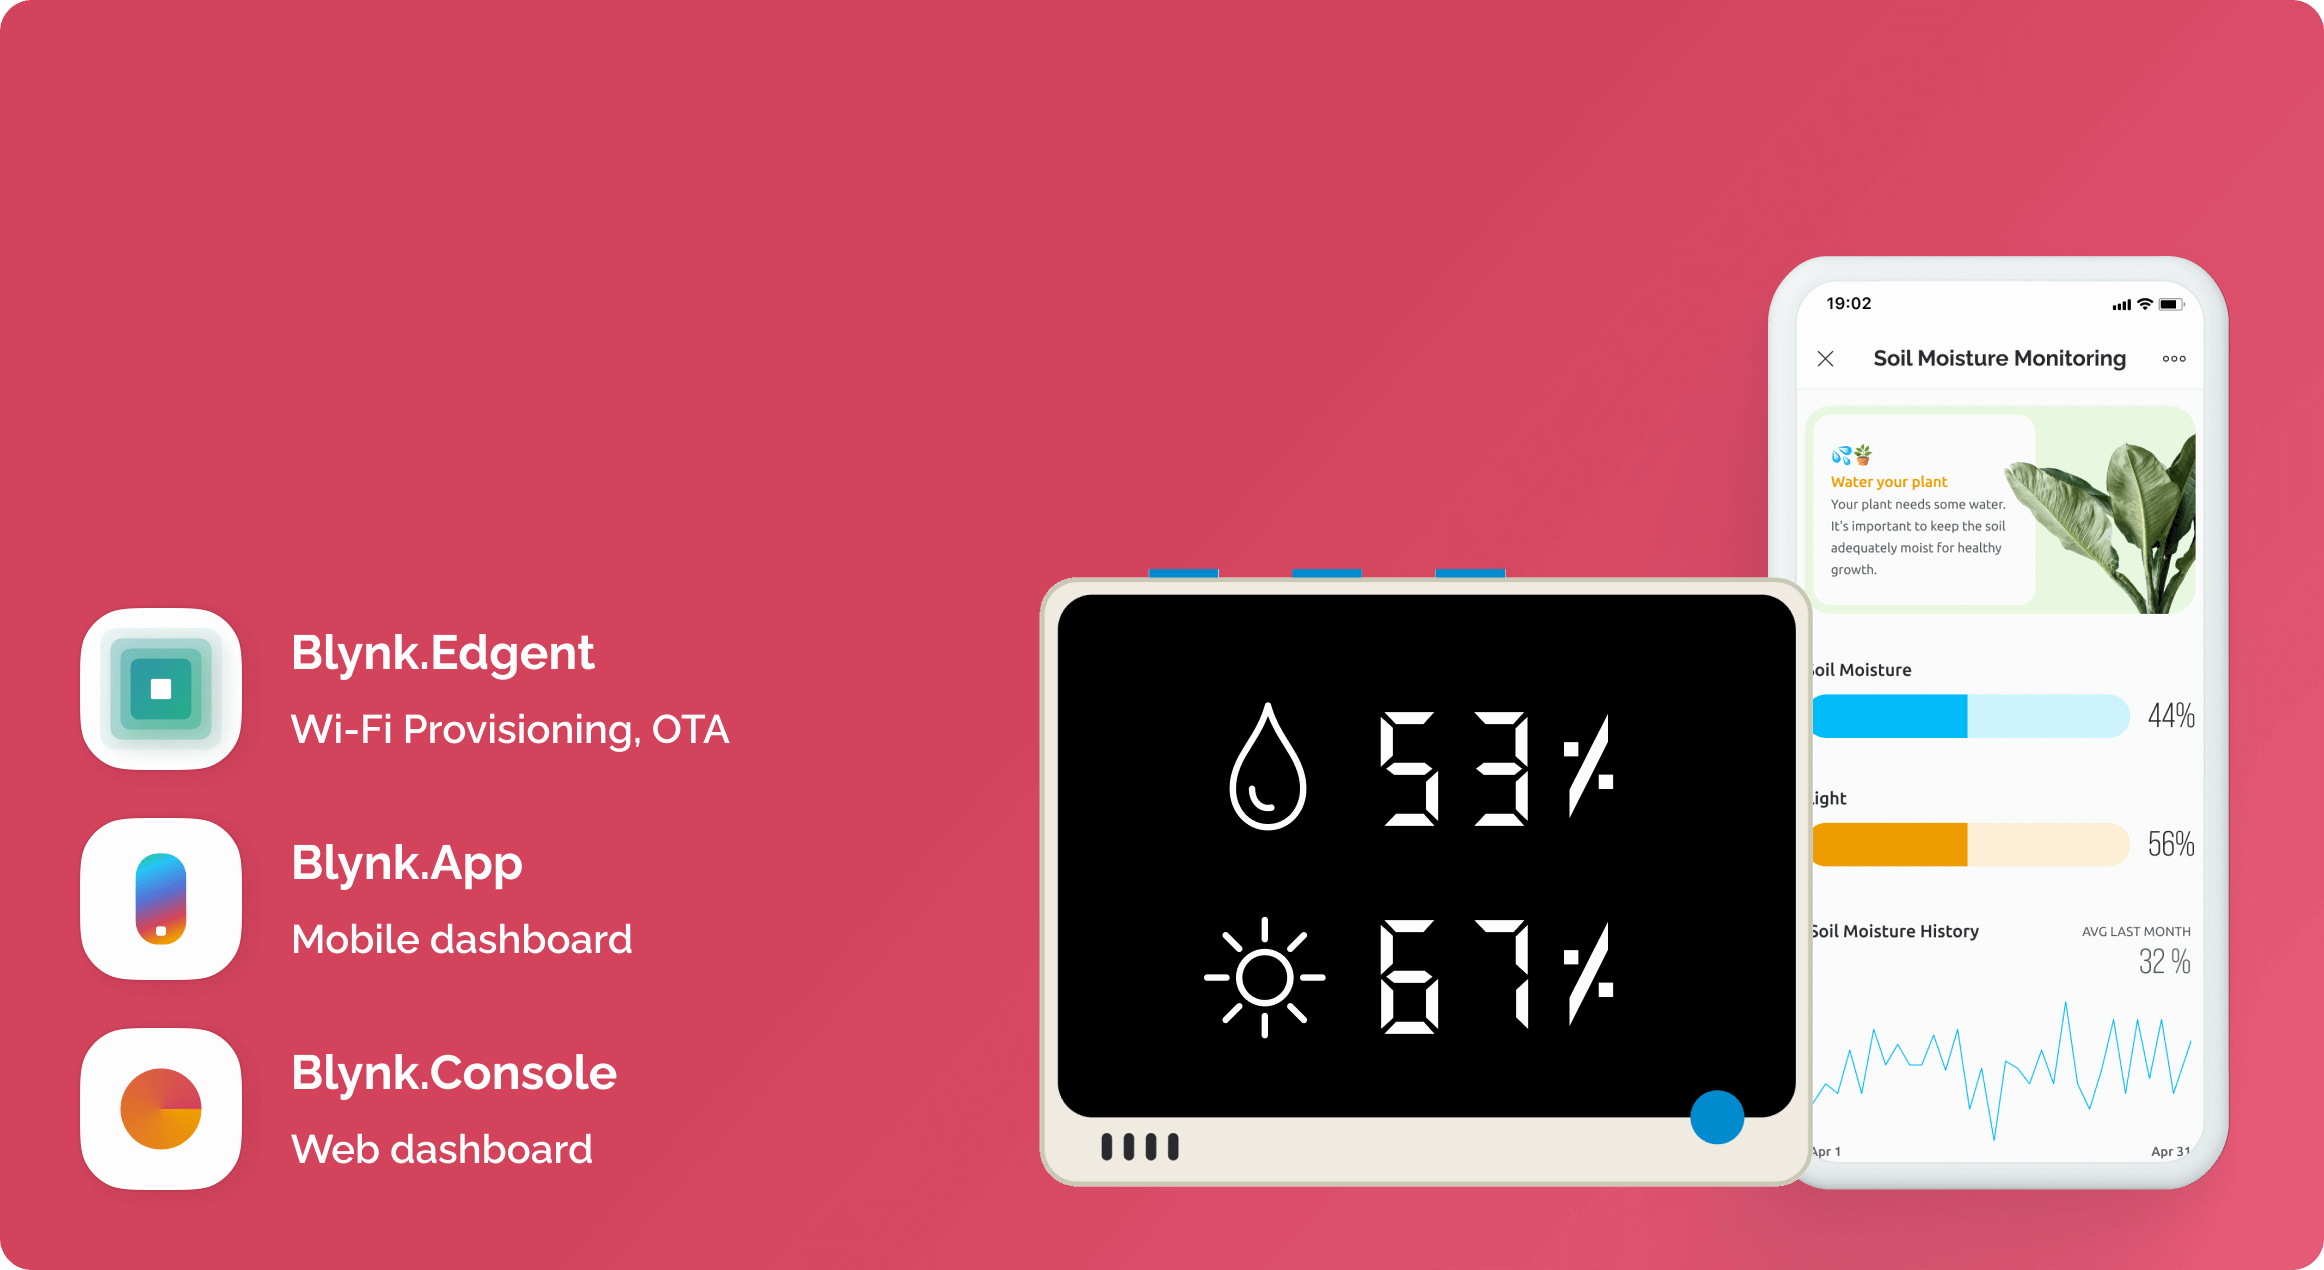
This blueprint will help you create a soil moisture and light monitoring system for your beloved plants! We will use a Seeed WIO terminal, soil moisture sensor, and Blynk!
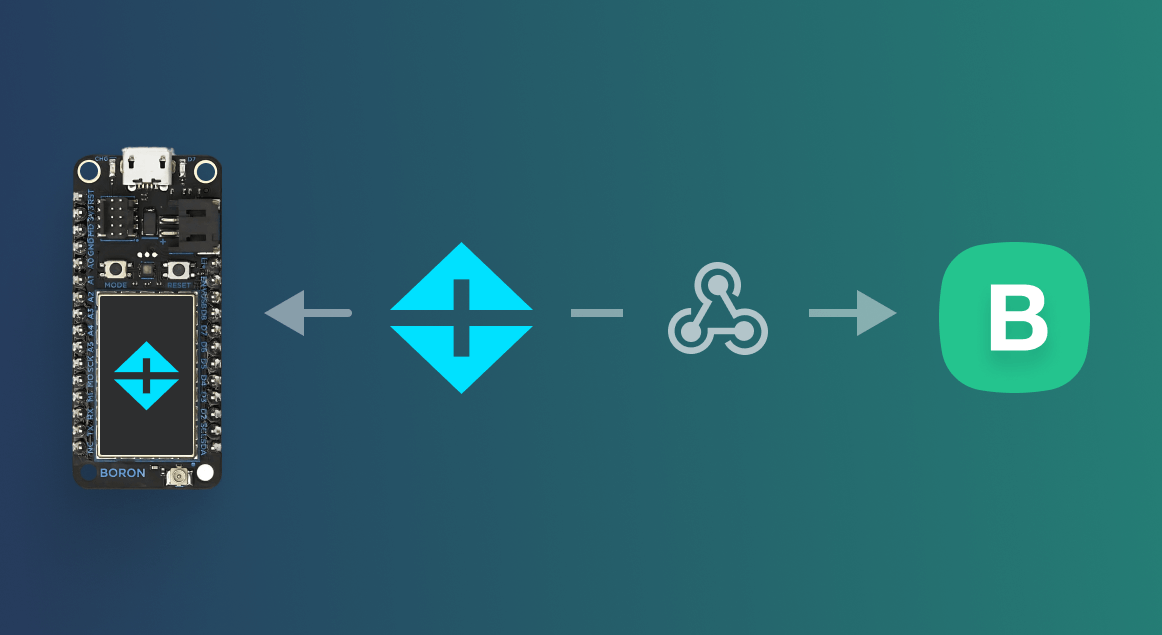
The blueprint includes Blynk.Edgent solution, which means you will be able to activate the device via your Blynk app just by entering your WiFi credentials (WiFi provisioning in action) and perform OTA firmware updates once the device has been connected! Let’s get started!
Components Used in This Project
1. Prepare Your Hardware
We need to connect a sensor to the WIO Terminal and then connect the board to the computer with a USB cable to upload the firmware.
- Connect Water Sensor to the port on the right side.
- Connect Seeeduino to PC via a USB cable.
2. Prepare Required Software
- Install Arduino IDE or PlatformIO
If you are using Arduino IDE, follow the next steps (skip for PlatformIO) - Install the following libraries:
- Blynk library
- https://github.com/jandrassy/ArduinoOTA
- seeed-studio/Seeed Arduino rpcUnified
- seeed-studio/Seeed Arduino rpcWiFi
- SPI
- ArduinoHttpClient
- Select the correct board and port following instructions from the Seeed Studio
- Create a new sketch
3. Prepare the Firmware and Upload It to Your Device
When using Blynk, you need to place TemplateID, TemplateName, AuthToken, and WiFi credentials in your sketch. We will provide you with the sketch with the two first already included, and the latter two will be included automatically during device activation - this scenario is possible because we are using Blynk.Edgent in this project. Follow the steps below.
- Click on the Activate device action in the Template Home tab (this tab should open automatically once you've pressed the Use Blueprint button)
- Download zip arhive
- Flash your device
- For Arduino IDE: Go to Sketch > Add File > Select sketch from the zip archive > Press Upload button
- For PlatformIO: Open project > Press PlatformIO: Upload
- Scan a QR code to start the device activation process in the app
- Click Start
- Connect to the "Blynk ... " network
- Select the network your device will use and click Continue
- Your device is connected now! Click Finish to open your device. You also will see your device in the Blynk Console
Check the Troubleshooting section at the end of this tutorial if you have issues uploading the firmware or connecting the device
4. Try It Out!
- You should be able to see real-time data displayed on mobile and web dashboard Gauges
- In a few minutes the historical data should appear on the Chart
Not working?
- Reboot the device and check if the data appears on the dashboard
- Check if the sensor is connected to the board as shown in the Prepare Your Hardware section
- Delete your device and try connecting it again considering the recommendations from the Troubleshooting section at the end of this tutorial
6. Template Breakdown
Every project you make on Blynk becomes a Template that you can use to create and manage similar devices. Every template consists of:
- Settings - general settings like which device and connectivity type. For this project, it's Seeed Wio Terminal with WiFi
- Datastreams - channels for time-stamped data transmitted between the device and the cloud. In this project, sensor data transmitted through Datastreams called Moisture and Light.
- Web and mobile dashboards - GUI to send data from web and mobile apps through datastreams to your devices. Dashboards are made of widgets. In this project, we used two Gauges (Enhanced Gauge on Mobile) to display real-time data and Chart widgets for historical data.
Conclusion
Congratulations on creating your own soil moisture and light monitoring system using the WIO Terminal and Blynk!
Check out the following section to explore the platform functionality and try modifying your project further.
Next Steps
Troubleshooting
- Make sure you have the latest Blynk Library installed
- Check that all used libraries are up to date
- Check that all the dependencies and configurations are correct
- Check your sketch for errors. Click the Verify button to compile your sketch without uploading it
- Check your board and port selections
- Check your connections. Your board needs to be connected with a data USB cable (charge-only cables will not work). Make sure the cable is fully inserted in the port on each end. Try a different USB cable, and avoid hubs and other adapters if possible. Remove connections to the board pins, especially the 0 (RX) and 1 (TX) digital pins.
- If your mobile device does not detect the Blynk network, then you most likely need to reset the configuration of your Wio Terminal.
How to Reset Device Configuration
1. Open the serial port terminal.
2. Press and hold the "A" (right) button on your Wio Terminal for 10 seconds. The serial port monitor terminal should display the following message:
- [XXXXX] Hold the button for 10 seconds to reset the configuration…
3. After 10 seconds, release the “A” button. You should see the following in the terminal:
- [XXXXX] RUNNING => RESET_CONFIG
- [XXXXX] Resetting configuration!
- [XXXXX] Configuration stored to flash
- [XXXXX] RESET_CONFIG => WAIT_CONFIG
- [XXXXX] Scanning networks..
4. Search the Blynk network again with your mobile device using the QR code.
Related Links
Blynk Troubleshooting guide
Documentation